uoPrint: Stapling
How to add stapling to your print jobs.
Stapling is only available for employees and accessible only through PaperCut Print Deploy Client
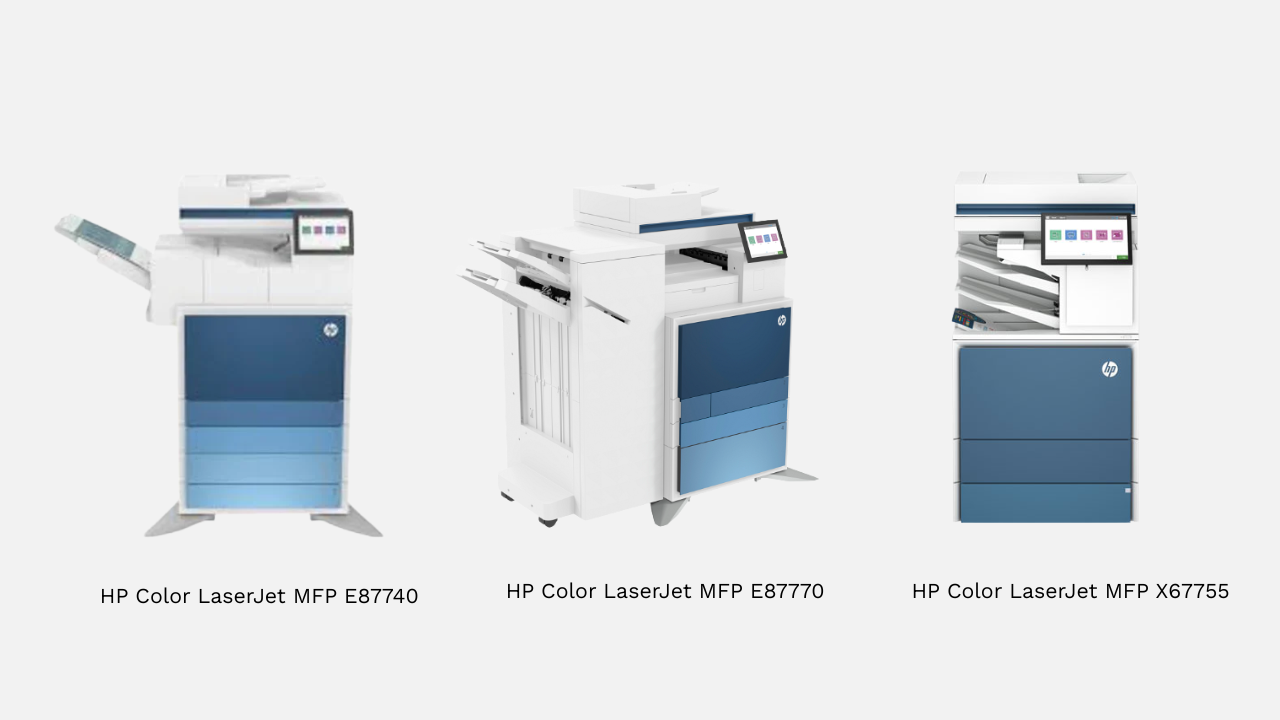
Stapling is only available on these printers.
Windows
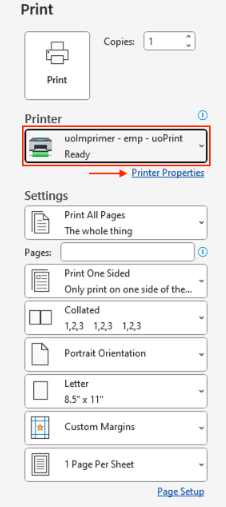
Once you are ready to print your document, navigate to "File" and then "Print". Select the printer name "uoImprimer - emp - uoPrint" and click on "Printer Properties".
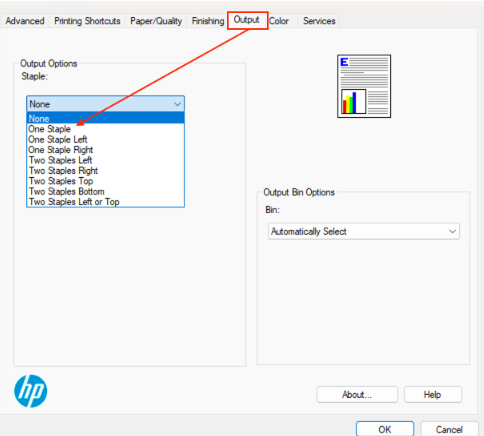
In the "Printer Properties" window, select the "Output" tab. Under the "Output Options", you will see different options for stapling. Once you have selected the option, click OK and then print your document. The printer will know to print your document with the stapling option, you don't need to do anything else at the printer screen.
macOS
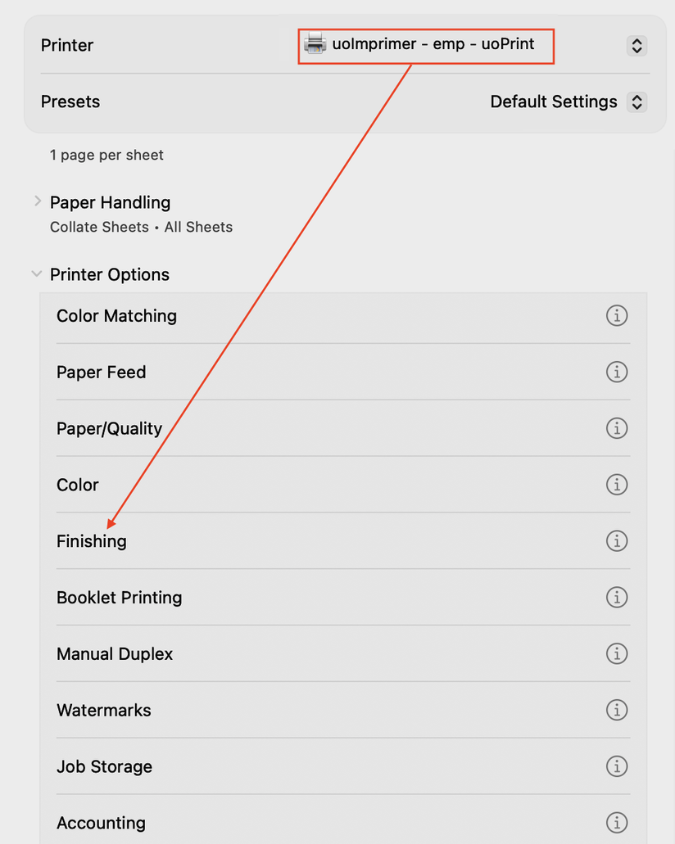
Once you are ready to print your document, navigate to "File" and then "Print". Select the printer name "uoImprimer - emp - uoPrint", expand the "Printer Options" and click on "Finishing". If you don't see the section for "Printer Options", you might need to click on the "Printer..." button usually found at the bottom of the Window.
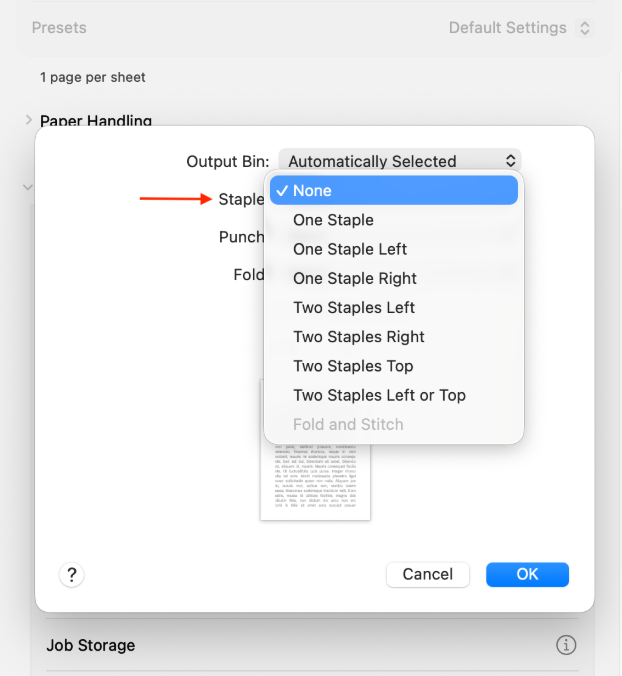
In the new Windows, you will see different options for stapling. Once you have selected the option, click OK and then print your document. The printer will know to print your document with the stapling option, you don't need to do anything else at the printer screen.