Printing installation guide for employees
Complete your printer installation to ensure a smooth and efficient printing experience.
Step 1
- You will need to have the new employee card to use the new printers. Please obtain your employee card from HR.
- Use enter your employee uoAccess credentials to access the printers functionalities.
If you are a Professor using a device not provided by uOttawa, please refer to this guide
Step 2
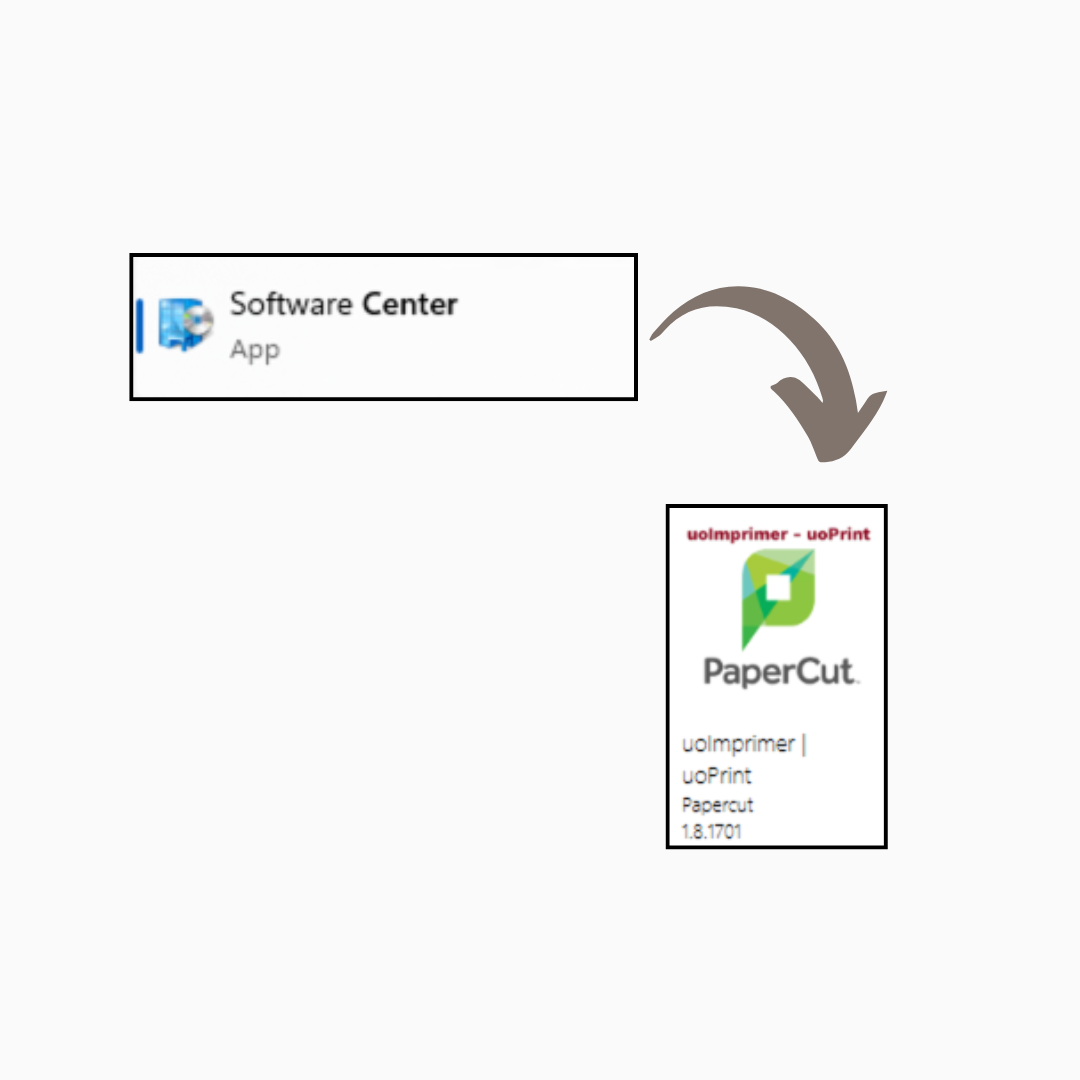
Windows
- From the Software Center app on your computer, find the application called uoImprimer | uoPrint, click on it to find the Install button
and press to install.
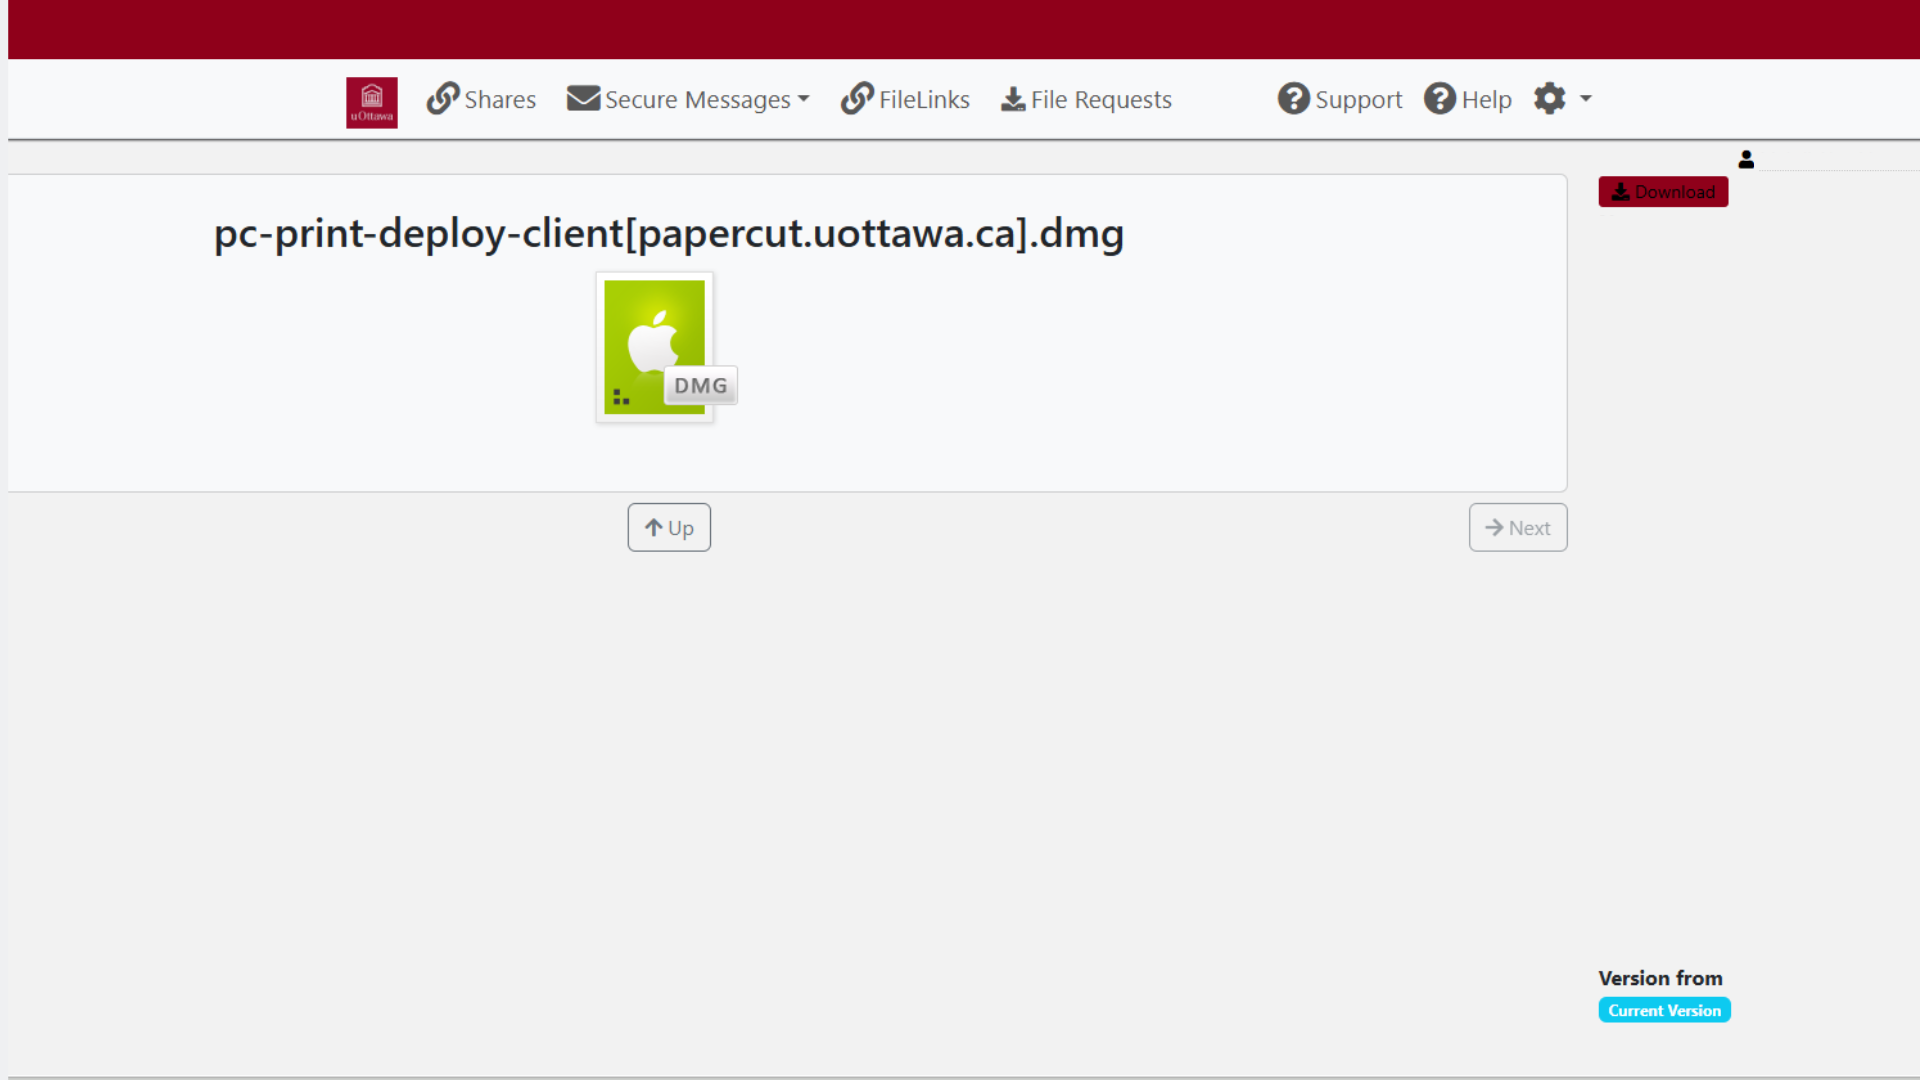
MacOS
- Download the employee print deploy app from the uoImprimer | uoPrint folder in LiquidFiles. You will need to launch the download to
start the installation process.
Step 3

- The printer should install on its own without user intervention. It will register the user that is currently logged in to the workstation.
- You can check your installed icons on the taskbar to confirm the installation
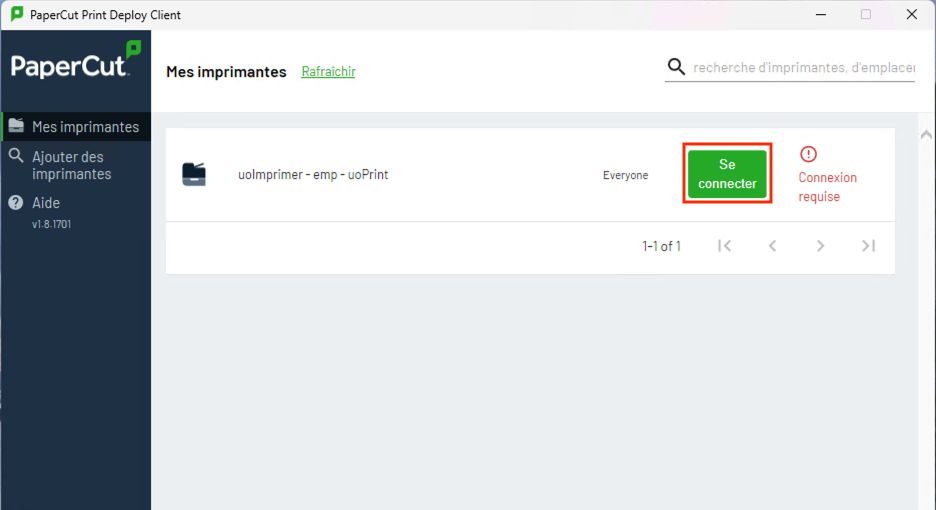
- If the installation doesn't work automatically, you will need to follow these steps.
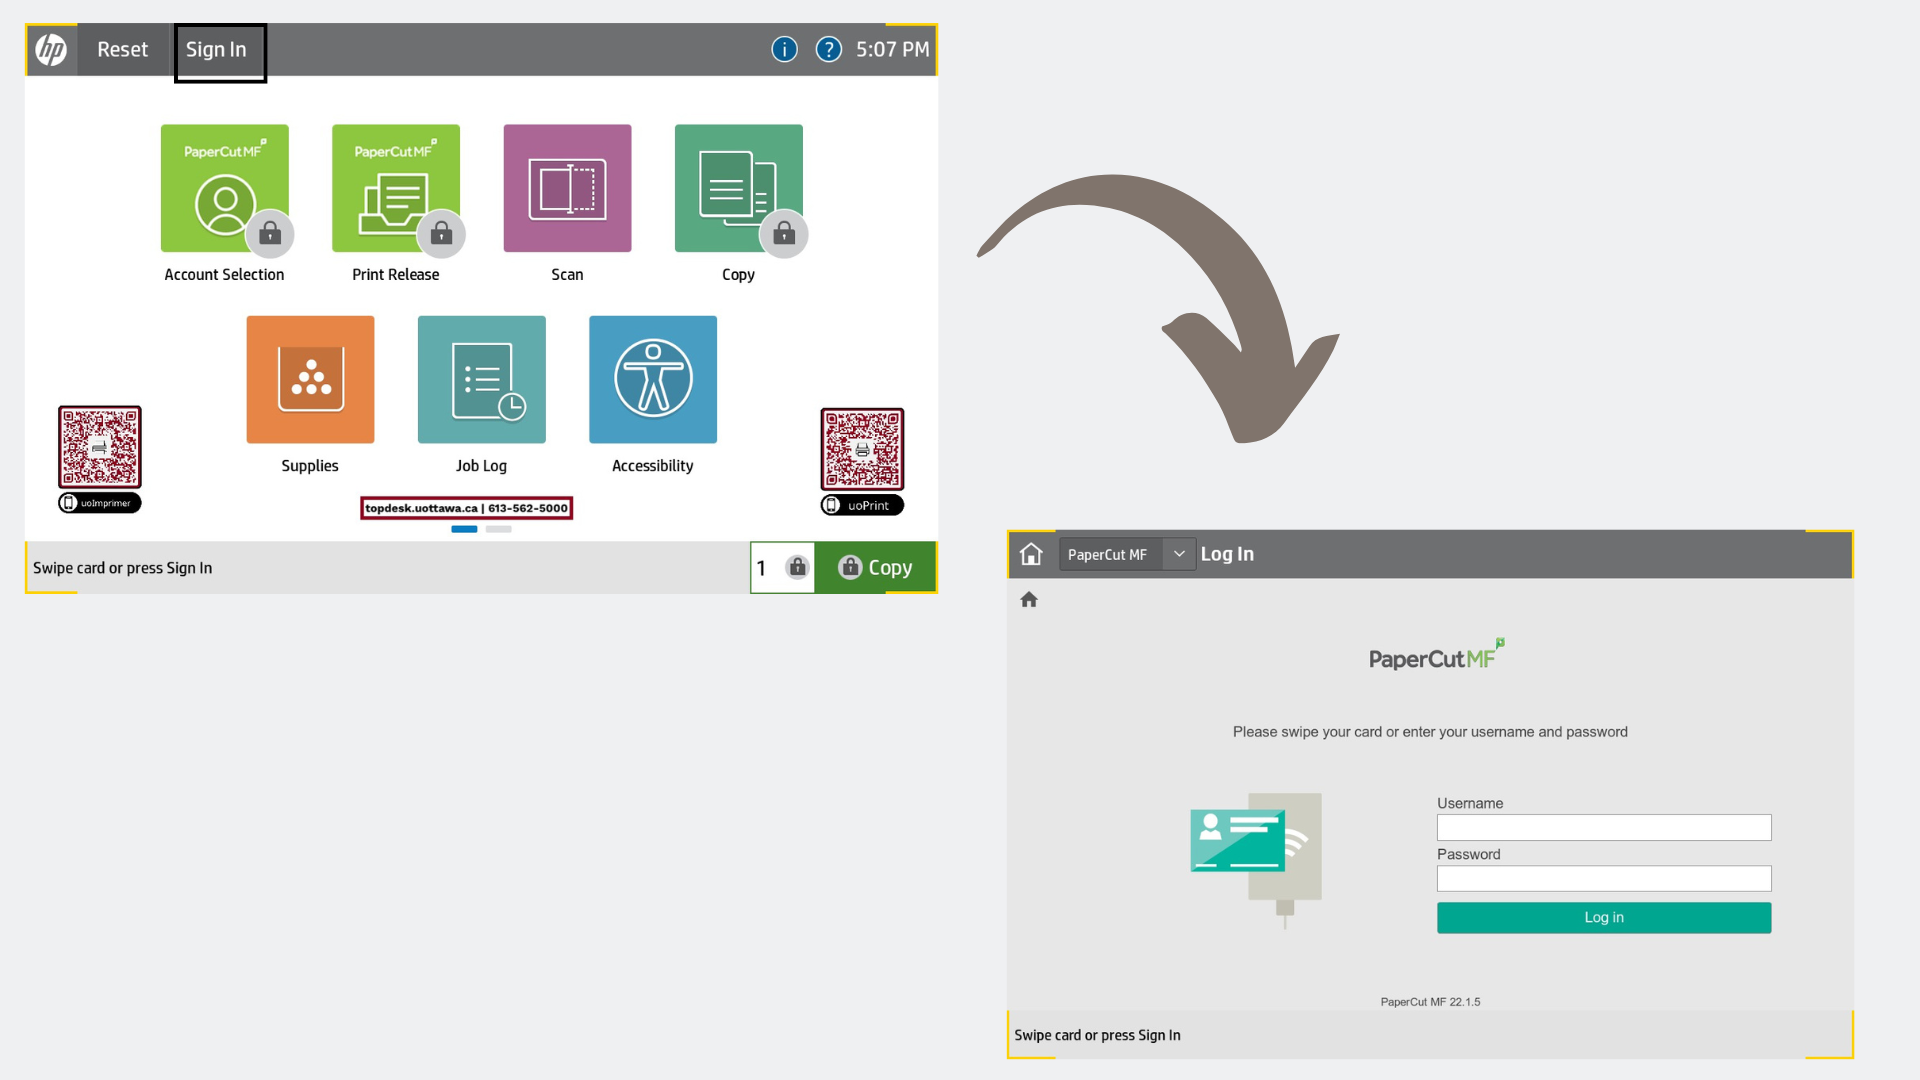
- Log in with your uoAccess account (requires only the first part of your email without the @uottawa.ca)
- Once you've logged in, it should start installing the print queue called uoImprimer - emp - uoPrint automatically.
- It will give you confirmation once it's installed and ready to be used.
Step 4
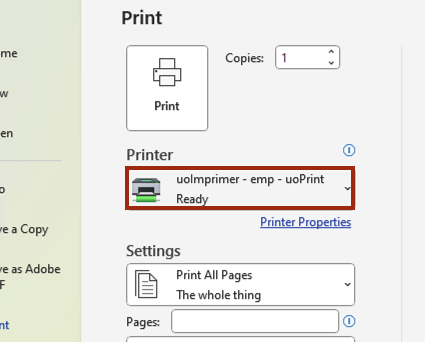
- You can now print by selecting the printer called uoImprimer - emp - uoPrint from all the different applications.
- The print jobs will stay in the system for the next 12 hours, you do not need to go to the printer right away