Address your specific printing needs in order to ensure a smooth and efficient printing experience for all.

Step 1

new HP public printers next to a uOttawa card
  • Find a printer.
  • Once at the printer, find the card reader and scan your employee card. The card reader will beep after few seconds, then it will  unlock the features.

Step 2

Print release process
  • you will find your queued print job(s) under the Print Release button on the screen.
     

Step 3

Color options screenshot
  • To release your job(s), you can select them individually or checkmark the box beside the select all jobs and click the print button at the bottom right of the screen.
  • Please note that the Print as grayscale and Print as 2-sided options are checked by default. You can uncheck them for all job(s) or can do so for each job; by clicking on the button, on the right side of the print job, to enter its different options.

If you have access to a shared account

Screen shot of the account selection window on the printer
  • After authenticating at the printer, use the Account Selection option on the screen to view all of your accounts.
     
printing job selection screenshot
  • All of your job(s) will require you to select an account to charge. You can also select all of your job(s) at once and click print. 
Account selection charge screenshot
  • You will get prompted to select one account for all job(s). You can also specify which account to charge, by selecting individual print job(s) using the options button on the right side of the print job.
     

Web print

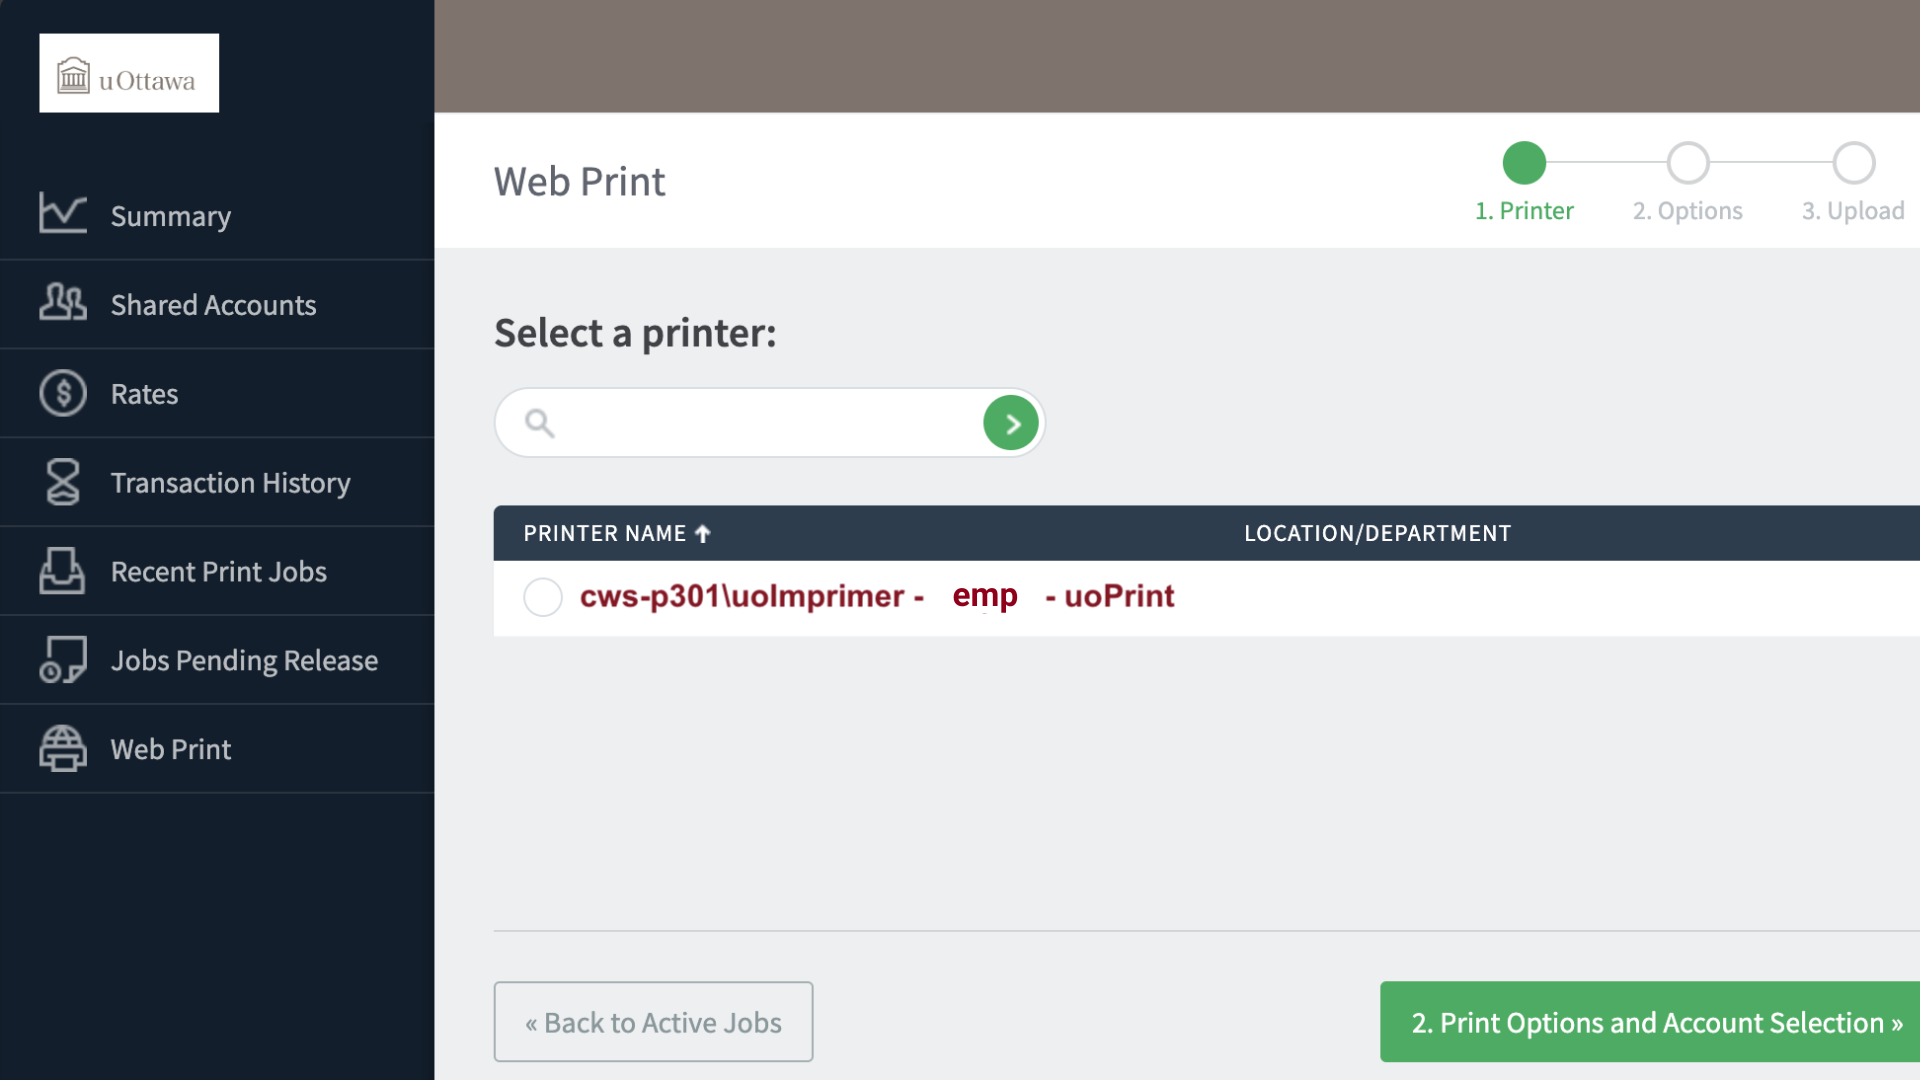
The uoPrint portal is secure and allows you to access and manage the entire printing process from any device.

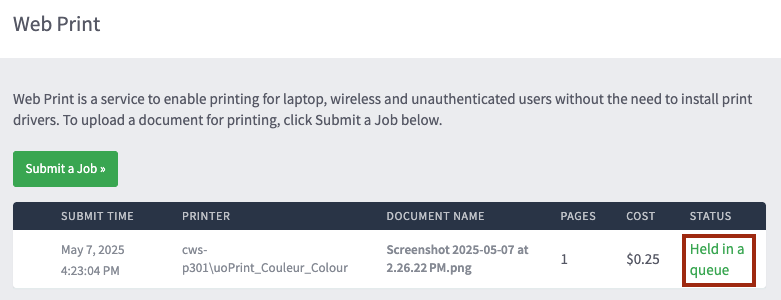
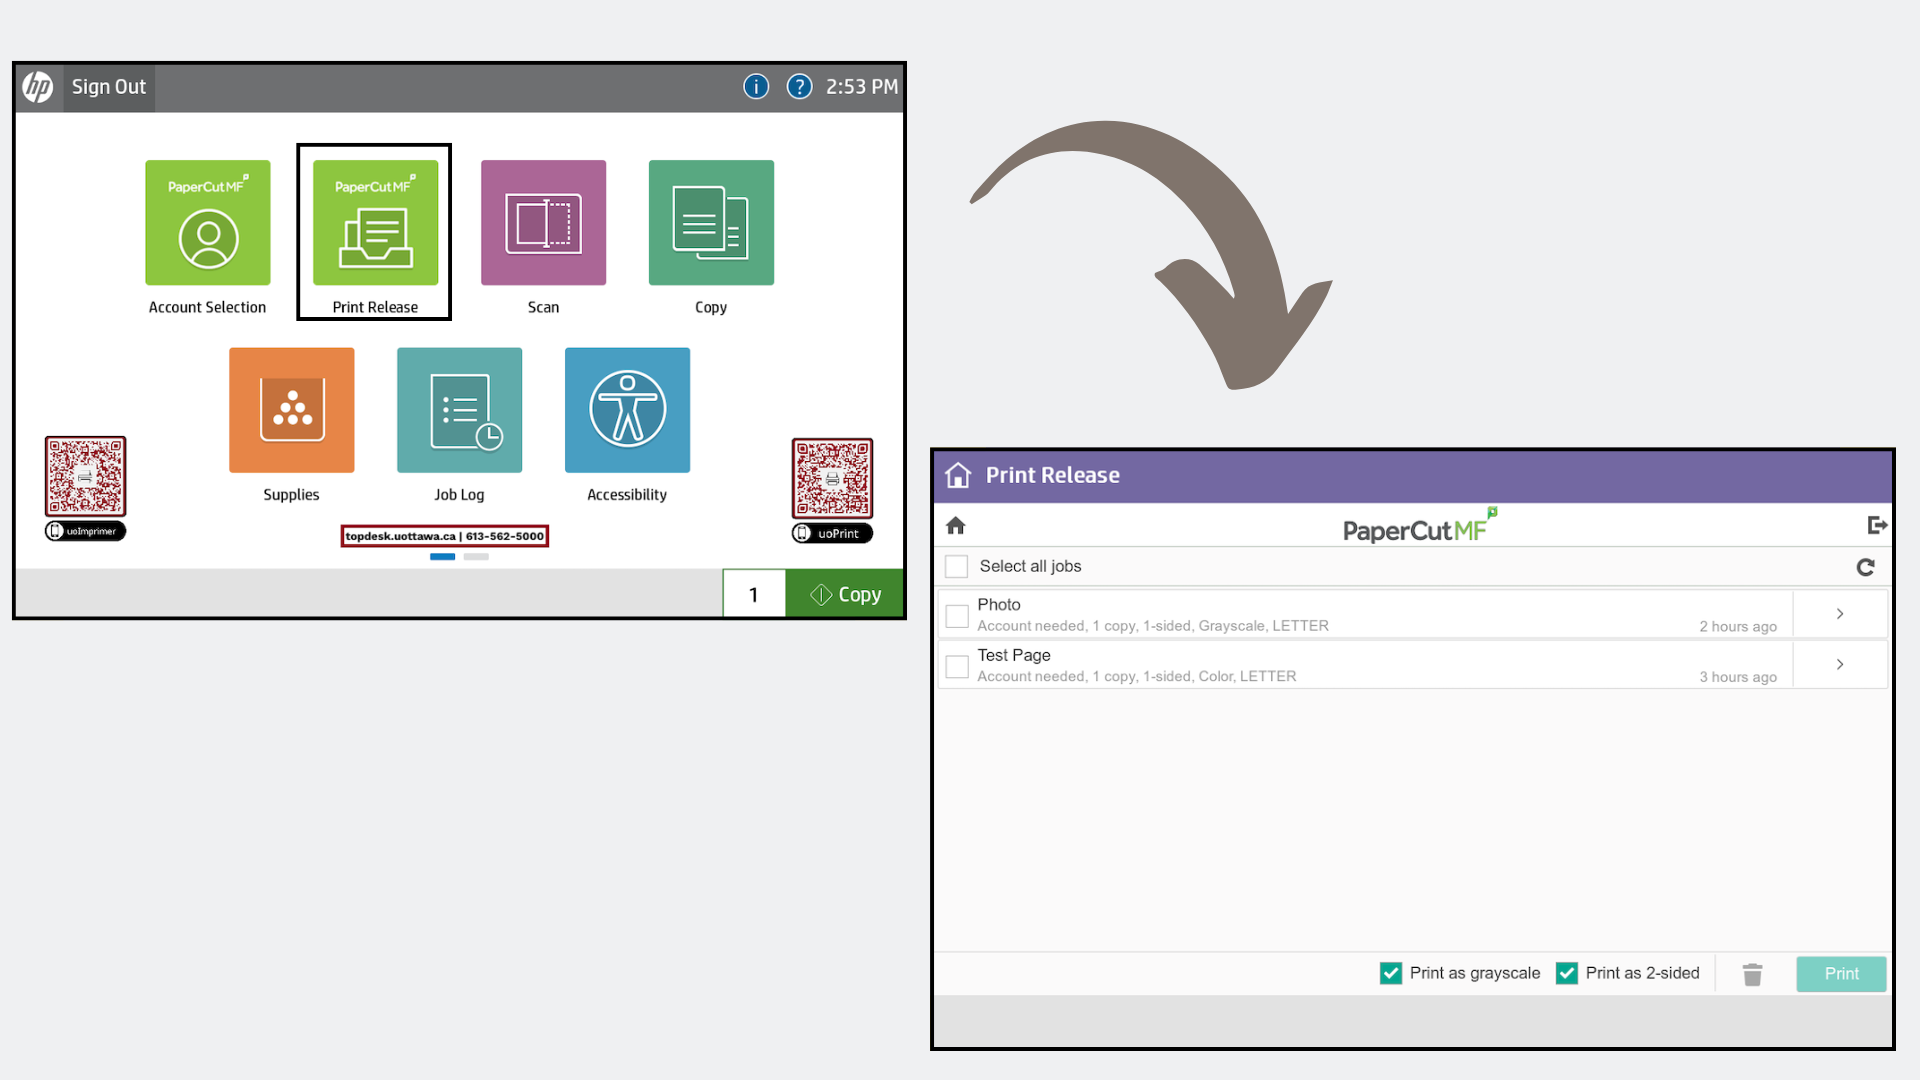
If you need to print a file previously uploaded and sent to print from your account, you can check the list of previously printed files.

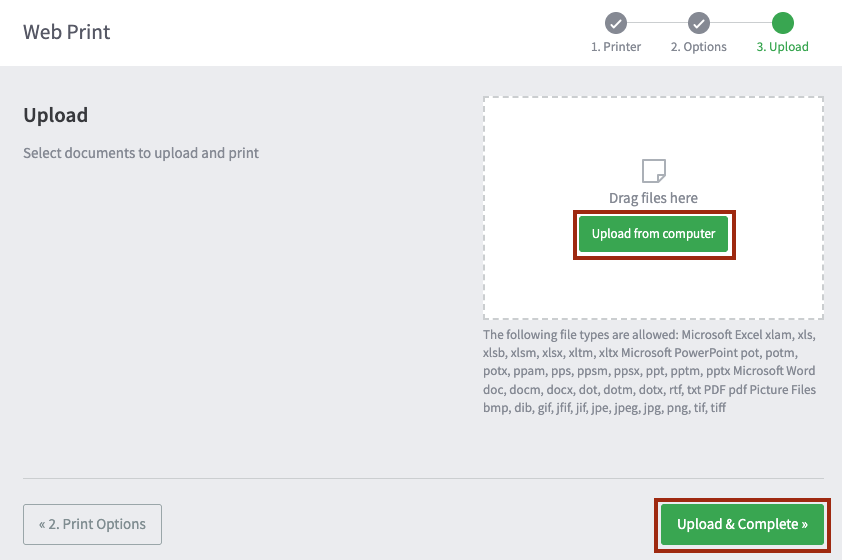
When using the portal, you can uoPrint these types of files: .pdf, .doc, .docx, .xls, .xlsx, .ptp, .ptpx, .xml. Most common image formats are also accepted, such as .jpg, .gif, .png, .tiff, and .bmp.

Please Note: You can only upload files that are 100 MB or less.

Webprint interface screenshot

Follow these steps to submit a document for print: 

  • Send your documents for print from your device.
  • Log in with your uoAccess credentials (username without @uottawa.ca and password).
  • From the left-side navigation menu, select Web Print.
  • Click Submit a Job.
Printer selection screenshot

Select a printer: cws-p301\uoImprimer - emp - uoPrint

number of copies selection
  • Select the number of copies you require by selecting Print Options and Account Selections.
  • Click Upload Documents. You can drag & drop files, or select Upload from Computer.
Document uploading window screenshot
  • To send the documents for print, select Upload & Complete.
     
Printing job queue screenshot
  • Once the upload is successful, the status displayed will show Held in queue.